
In summary:
- Successful sand driving is less about power and more about maximizing tire footprint through precise pressure reduction.
- Your PSI is not just one number; it’s a strategy. Adjust from 18-20 PSI for firm sand down to 10-12 PSI for soft recovery situations.
- Essential recovery gear is non-negotiable for a solo trip: a long-handled shovel, recovery boards, and a reliable air compressor are the bare minimum.
- Never drive in the desert at high noon. The flat, shadowless light makes it impossible to read the terrain, hiding dangerous drops and soft patches.
- Structured training is critical. Learning recovery techniques in a controlled environment is infinitely safer than improvising when you’re stuck and alone.
The allure of a solo desert drive is powerful—just you, your 4×4, and an endless sea of dunes. But for the first-timer, this dream is often shadowed by a significant fear: getting stuck, alone, with no help in sight. The common advice you hear—”just lower your tire pressure” or “carry a shovel”—is dangerously incomplete. It treats a complex environment like a simple problem. This approach ignores the fundamental physics of sand, vehicle dynamics, and risk management. It’s the reason many first solo trips end in frustration or a call for an expensive recovery service.
The truth is that safe and confident solo desert driving is not a matter of luck or brute force. It is a calculated science. The key isn’t just *if* you deflate your tires, but *how*, *when*, and *why*. It’s about understanding that your vehicle and the desert form a system, and your control over tire pressure (PSI) is the primary way you manipulate that system for traction, control, and, most importantly, self-recovery. This guide moves beyond simplistic tips to provide a technical, safety-first framework. We will treat PSI as a dynamic strategy, not a static number.
This article will equip you with the mindset and techniques of a professional. We’ll break down the non-negotiable recovery tools you need *before* you even see the sand. We will explore the critical differences in learning environments, demystify advanced driving techniques to protect your vehicle, and analyze how environmental factors like time of day can make or break your drive. By the end, you won’t just know what to do; you’ll understand the principles behind it, empowering you to make smart, safe decisions when you’re on your own.
This comprehensive guide is structured to build your knowledge progressively, from preparation to advanced techniques. Explore the sections below to master each critical aspect of solo desert driving.
Summary: Your Roadmap to Safe Sand Driving
- The 3 Recovery Tools You Must Have Before Entering the Desert
- Club Drive vs Paid Course: Where Should Beginners Learn?
- How to Avoid “Cresting” and Damaging Your Undercarriage?
- Al Qudra vs Big Red: Which Dunes are Safe for Beginners?
- Why Driving at High Noon Makes Reading the Dunes Impossible?
- Rent a Supercar or Use Your Own: Which is Cheaper for a Track Day?
- Are Dune Bashing Safaris Safe for Toddlers in Car Seats?
- Private vs Shared Safari: Is the $200 Difference Worth It?
The 3 Recovery Tools You Must Have Before Entering the Desert
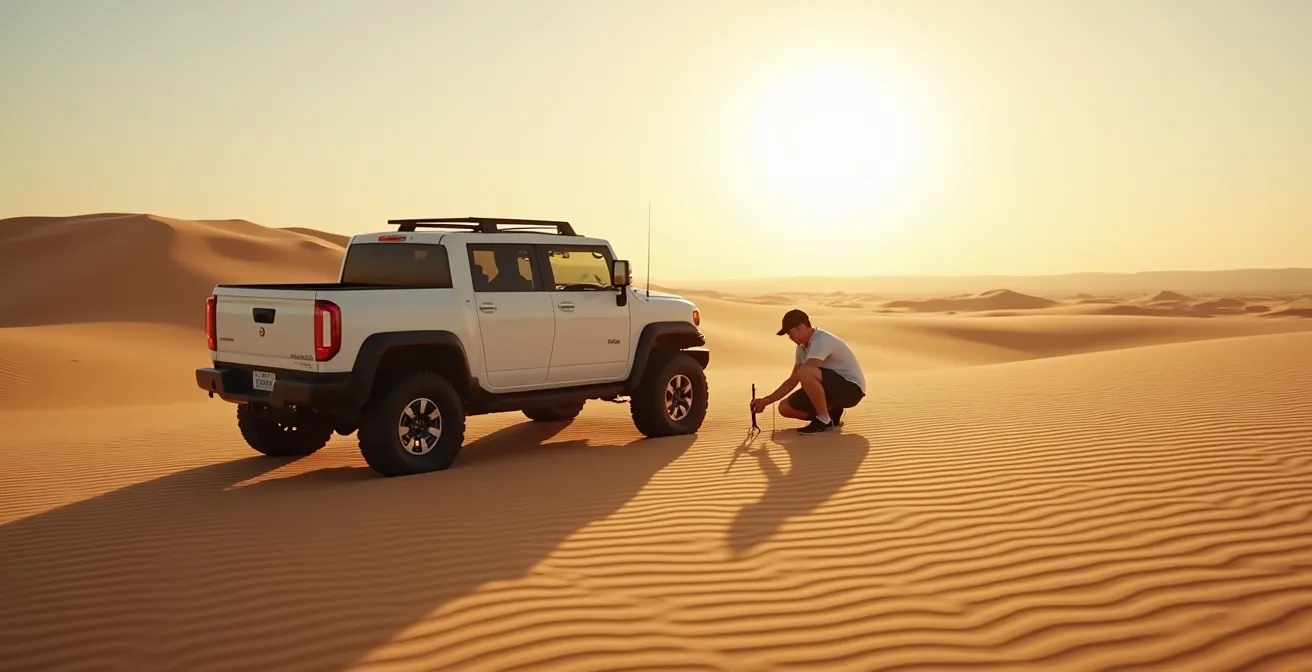
For a solo driver, your recovery gear is not an accessory; it is your lifeline. Relying on the kindness of strangers is not a strategy. Before your tires touch the sand, you must have a tiered recovery system ready. This begins with the most fundamental tool: a long-handled shovel. It’s not for digging a trench, but for clearing sand from in front of all four tires to create a gentle ramp for your escape. The second critical item is a set of recovery boards (like Maxtrax or TREDs). These are indispensable when the shovel alone isn’t enough, providing the essential traction needed to get moving from a standstill in soft sand. Forget a simple tow rope; for sand, you need a kinetic recovery rope, which stretches to store energy and deliver a smoother, more effective pull, reducing shock load on both vehicles if you do encounter help.
Finally, your deflation strategy is useless without the ability to reinflate. A high-capacity, reliable air compressor is non-negotiable. It’s what allows you to safely return to the road. To manage this process efficiently, professional-grade tools are a worthy investment. For instance, some professional deflators can reduce pressure from 30 to 15 PSI in under 20 seconds per tire, a critical time-saver when you need to make quick adjustments. This equipment isn’t about convenience; it’s about giving you the control and capability to be self-sufficient, which is the cornerstone of safe solo off-roading.
Club Drive vs Paid Course: Where Should Beginners Learn?
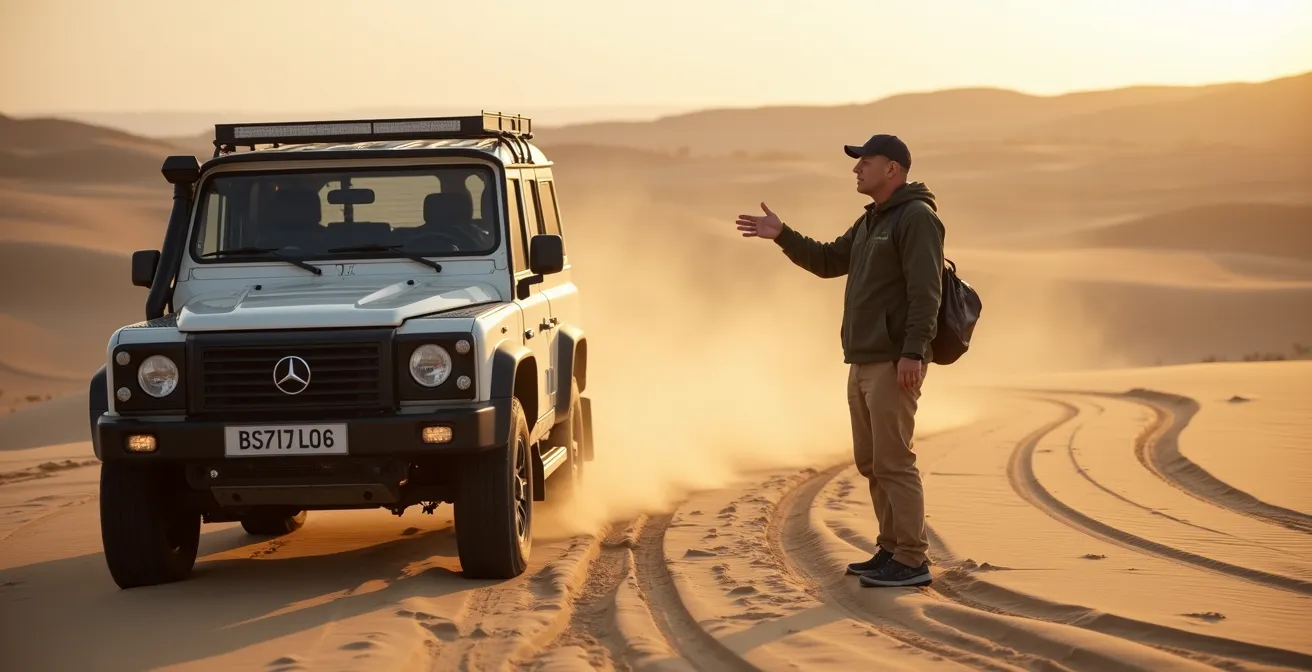
Learning from others is essential, but the environment in which you learn has a profound impact on your safety and skill acquisition, especially as a future solo driver. A typical club drive offers a social setting where you can learn by observing peers. However, the quality of advice can be inconsistent, and the group’s patience for a beginner’s mistakes may vary. Recovery situations are often chaotic, with everyone offering different advice, which is not an ideal way to learn safe procedures. In contrast, a paid off-road course provides a structured, safety-first environment specifically designed for learning. An instructor’s job is to create a space where you can make mistakes without serious consequences.
In a professional course, you engage in structured pressure experiments to feel how the vehicle responds at different PSI levels. You practice recovery techniques under the watchful eye of an expert who ensures it’s done correctly and safely. As this image of a professional instructor demonstrates, the focus is on clear, methodical teaching. These courses provide professional-grade recovery gear, so you can learn with the right tools before investing yourself. For a beginner aiming for solo driving, the controlled environment of a paid course is invaluable for building a solid foundation of technical skills and safety protocols.
The following table, based on information from professional 4×4 training providers, breaks down the key differences.
| Aspect | Club Drive | Paid Course |
|---|---|---|
| PSI Training | Learn from peers’ experience | Structured pressure experiments |
| Recovery Practice | Peer-assisted recoveries | Instructor-led safe recoveries |
| Equipment | Varied member setups | Professional recovery gear provided |
| Mistake Tolerance | Group patience varies | Safe learning environment |
How to Avoid “Cresting” and Damaging Your Undercarriage?
One of the most common and costly mistakes for a beginner is misjudging a dune crest. Approaching with too much speed causes the vehicle to launch over the top, slamming the undercarriage onto the sand. Approaching with too little momentum leaves you “beached” on the crest, a precarious situation known as cresting. The key to mastering this is smooth, controlled momentum and understanding the vehicle’s balance. You must approach a crest not with a burst of speed, but with a steady throttle that is just enough to get your front wheels to the peak. As you feel the vehicle’s nose start to lighten and tip forward, you must ease off the throttle to let gravity gently pull you down the other side, known as the slip-face.
A more advanced, professional technique to perfect this control is left-foot braking. While maintaining light, steady pressure on the throttle with your right foot, you use your left foot to gently apply the brake as you reach the crest. This act of “pre-loading” the drivetrain prevents the vehicle from lurching forward and gives you millimeter-perfect control over your descent, completely avoiding the see-saw effect that can get you stuck. It’s a technique that requires practice but transforms your ability to navigate dune ridges with mechanical sympathy, protecting your vehicle’s frame, suspension, and drivetrain from damage. If you do start to bog down, the immediate rule is to stop, deflate by another 2-3 PSI, and clear a path before attempting to move again.
Action Plan: Mastering Crest Control with Left-Foot Braking
- Approach the crest with steady momentum at an appropriate PSI (e.g., 15-18 for stability).
- As your front wheels reach the edge of the crest, gently apply the brake with your left foot while maintaining consistent throttle with your right.
- Use the brake to precisely control the descent angle and prevent the vehicle from see-sawing on its chassis.
- Maintain light throttle throughout the transition to ensure the engine doesn’t stall and you retain control.
- Gradually release the brake as the vehicle’s weight shifts fully onto the downslope, allowing a smooth descent.
Al Qudra vs Big Red: Which Dunes are Safe for Beginners?
Not all sand is created equal. For a beginner, choosing the right location is a critical safety decision. It’s about applying a principle of progressive exposure—starting in a forgiving environment before tackling more challenging terrain. In the context of popular UAE desert spots, this means understanding the difference between a place like Al Qudra and the infamous Big Red (Al Hamar). Al Qudra is characterized by smaller, more rounded dunes and relatively compacted sand. This makes it an ideal training ground. The risk of getting seriously stuck is lower, and the lines are easier to read, allowing you to focus on fundamentals like maintaining momentum and getting a feel for how your vehicle behaves on sand at around 15-18 PSI.
Big Red, on the other hand, features much larger, steeper dunes with deep bowls and extremely soft, fine sand, especially on the slip-faces. This terrain is far less forgiving and requires a higher level of skill and confidence. The consequences of a mistake, like a failed climb or a misjudged side-slope, are much more severe. Even the optimal pressure range varies greatly by vehicle, and what works in Al Qudra might not be low enough for the soft sand of Big Red. Some drivers might need to adjust front and rear tires differently, for instance running 20 PSI in the front and 25 PSI in the rear on firmer ground, but dropping much lower in soft sand. Master the basics and practice your self-recovery skills extensively in a beginner-friendly area before you even consider attempting a more advanced location on your own.
Why Driving at High Noon Makes Reading the Dunes Impossible?
One of the most critical safety rules in desert driving is to avoid the hours around high noon, typically from 11 AM to 2 PM. This isn’t about avoiding the heat, although that’s a valid concern; it’s about the physics of light and perception. When the sun is directly overhead, it creates what is known as flat light. This eliminates the shadows that your brain uses to perceive depth, texture, and gradient. Under flat light, a steep 10-meter drop-off can look identical to a gentle, rolling dune. The entire landscape appears as a uniform, textureless surface, making it impossible to “read the sand.” You cannot distinguish soft patches from firm ground or identify the safe line to take over a crest.
Driving in these conditions is like navigating a minefield blindfolded. The morning and late afternoon, when the sun is at a lower angle, are the safest times to drive. The long shadows cast by the dunes clearly define their shape, revealing every ripple, ridge, and potential hazard. This allows you to plan your approach and anticipate changes in terrain. Furthermore, the intense midday heat causes the air inside your tires to expand, a phenomenon called PSI creep. A tire deflated to 15 PSI in the cool morning could easily increase to 18-19 PSI by the afternoon, reducing your tire’s footprint and increasing the risk of getting bogged down. You must account for this temperature-induced pressure change and potentially re-adjust your PSI at midday if you are stationary.

Rent a Supercar or Use Your Own: Which is Cheaper for a Track Day?
While this question is framed for a track day, the core dilemma—subjecting your own vehicle to extreme conditions versus a purpose-built alternative—is highly relevant to the aspiring desert driver. Your daily driver 4×4 is an expensive asset, and desert driving, even when done correctly, accelerates wear and tear. The “cost” of a desert trip isn’t just fuel; it’s the increased strain on your suspension, the risk of cosmetic damage from brush (if applicable), and the accelerated wear on your tires. Running tires at low pressure, while necessary for traction, increases heat and sidewall flex, which shortens their lifespan. While there isn’t a “rental” market for solo desert expeditions, it’s crucial to weigh the true cost of using your own vehicle.
This includes preparing it for the task: a thorough mechanical check, investing in all-terrain tires if you don’t have them, and accepting the risk of damage. If you get stuck and attempt a recovery, the forces exerted on your vehicle’s chassis and recovery points are immense. The financial risk of a mistake is entirely your own. While recommended beach driving pressures range from 16 PSI for normal driving to as low as 8-10 PSI for a dire emergency recovery, running at these very low pressures on your own vehicle significantly increases the risk of debeading the tire or damaging the rim. This cost-benefit analysis should push you towards investing in two things: proper training to minimize mistakes, and proper recovery gear to make self-extraction safer for you and your vehicle.
Are Dune Bashing Safaris Safe for Toddlers in Car Seats?
The core of this question is not about toddlers specifically, but about passenger safety and comfort under extreme multi-axis forces. As a solo driver, you may initially drive alone, but eventually, you will likely take passengers. It is your absolute responsibility as the captain of the vehicle to adjust your driving style for their safety and comfort. A passenger’s tolerance for the jarring movements, steep angles, and G-forces of dune driving will be far lower than your own. What feels like exciting driving to you can be a nauseating and frightening experience for them. This requires a fundamental shift in your approach: you are no longer just driving, you are managing your passengers’ experience.
This means choosing more conservative lines that avoid steep side slopes and sharp crests. It requires exceptionally smooth throttle and braking inputs to prevent jarring, whiplash-like movements. You may also need to run a slightly higher tire pressure, perhaps 20-22 PSI instead of 15 PSI, to provide a firmer, more stable ride at the expense of some outright capability. This is a deliberate compromise: you are trading a small amount of performance for a large gain in passenger comfort and safety. Frequent stops to check on your passengers are not a sign of weakness but of a responsible and professional driver. The goal is for everyone to enjoy the experience, not just endure it.
Action Plan: Managing G-Forces for Passenger Comfort
- Maintain a higher PSI (20-22) for a firmer, more stable ride when carrying passengers.
- Choose conservative driving lines, consciously avoiding steep side angles and aggressive climbs.
- Significantly reduce your speed when approaching crests to minimize vertical G-forces and prevent the vehicle from becoming airborne.
- Use smooth, deliberate throttle and braking transitions to prevent any sudden, jarring movements.
- Plan for brief stops every 20-30 minutes to allow passengers to reset and to check on their comfort and well-being.
Key takeaways
- Tire pressure is your most critical tool; master a tiered strategy from 18 PSI down to 10 PSI for different sand conditions.
- Never enter the desert alone without a shovel, recovery boards, and a reliable air compressor—these are your self-rescue system.
- The safest way to learn is through a professional course, which provides a structured environment to practice skills like recovery without real-world risk.
- Avoid driving at high noon at all costs; the flat light makes it impossible to read the terrain, hiding serious dangers in plain sight.
Private vs Shared Safari: Is the $200 Difference Worth It?
For a beginner planning solo trips, observing commercial safari convoys can be a valuable, free learning opportunity. The question of “private vs. shared” can be reframed into: what can I learn by watching these different operations? A shared safari is like a live-action classroom on group dynamics and varying skill levels. You can park at a safe distance and watch how a convoy of multiple vehicles tackles an obstacle. You’ll see different drivers choose different lines, some successfully and some not. You’ll witness real-world recovery situations and see the various techniques and equipment that are used. It’s a raw, unfiltered look at desert driving.
Observing a private safari or, even better, a professional training vehicle, offers a different lesson. This is your chance to study the expert. Watch the lead driver’s line choices—they are often smoother and more efficient. Notice their vehicle control and the calm, methodical way they approach obstacles. You can’t ask questions, but you can analyze their technique. This is also an opportunity for equipment study. Safari vehicles are often equipped with robust, professional-grade gear. You might notice the use of multi-tire inflation/deflation systems, which allow drivers to adjust all four tires simultaneously, ensuring consistent pressure and saving valuable time. Seeing what the pros use, and how they use it, can inform your own future gear choices and driving aspirations.
This table analyzes the learning opportunities from a solo driver’s observational perspective.
| Learning Aspect | Private Safari (Observing an Expert) | Shared Safari (Observing a Group) |
|---|---|---|
| PSI Strategy Discussion | One-on-one explanations | Observe driver decisions |
| Line Choice Analysis | Ask questions freely | Watch multiple attempts |
| Recovery Techniques | Detailed demonstration | See various skill levels |
| Equipment Study | Full access to inspect | Visual observation only |
Now that you understand the fundamental principles of preparation, technique, and safety, the next step is to put them into practice. Start in a designated, beginner-friendly area and methodically work on each skill. Your journey to becoming a confident solo desert driver begins not with a bold adventure, but with a safe and deliberate first step.